- How to fetch data from Webiny
- How to parse data including rich text
- how to use preview mode
Overview
Webiny works really well as a headless CMS with NextJS  , especially is that so when using static rendering and the new Preview mode available in NextJS version 9.3.
The easiest way to get started is to use the official starter , but we’re going to walk through a similar custom implementation here.
Use the official starter for 1-click install on Vercel.
For this tutorial, we’re going to assume you have already done the following:
Once you have an app up and running, click into the “HeadlessCMS” app in the sidebar, click on models.

Add the following models and fields: (Skip this step if you already have content models defined)
Authors
- A
textfield with the value “name” - A
textfield with the value “slug” (optionally add a validator using this regex which will make sure you have valid urls:^(?!.*--)[a-z0-9\-]+$) - a
filesfield with the value “picture”
Posts
- A
textfield with the value “title” - A
textfield with the value “slug” (optionally use the regex above as a validator) - A
filesfield with the value “featured image” - A
rich textfield with the value “body” - A
referencefield with the value “Author”
Next, add some content by going to Headless CMS > Ungrouped and choosing a content model.
Before we spin up our NextJS project, let’s go to the API playrgound and see how our GraphQL API is structured. In the sidebar menu, choose “API Playground” to open the GraphQL explorer.

Notice that there are four APIs listed in the tabs at the top of the page. Choose HeadlessCMS - Read API. From here you can explore your content structure and the schema (via the right side panel). Directly below the tabs is a URL string. That’s the URL you can use to fetch data.
Make a note of this URL, you’ll need it soon.
Let’s configure API credentials. Choose API Keys in the sidebar. Add an API key with any name and description. Select “Headless CMS” and choose a Custom access level for all content model groups with the values read and preview. Make sure to leave “manage” unchecked. This will help secure our Webiny instance.
Save the API token and the Token itself will be revealed. You can use the same API token for both published and draft posts.
Set up a NextJS project
You can follow the “Getting Started” page on the NextJS site , or run yarn create next-app to spin up a basic project.
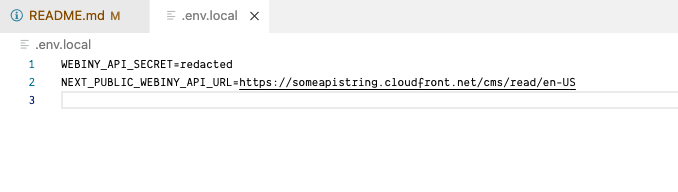
Once you’ve done one of these, add a new file .env.local to the project root. NextJS will look for environment variables in that location.
You can read more about how NextJS uses Environment Variables here .
Add the API endpoint URL (maybe call it NEXT_PUBLIC_WEBINY_API_URL), and the API token (maybe as WEBINY_API_SECRET). Make sure you don’t commit this file to your project’s git repository otherwise anyone could gain access to your API.
Fetching data
Once you have your .env.local file set up in the project root (see above), you can try to connect to the API. Here’s some sample code for the connection:
async function fetchAPI(query, { variables } = {} ) {
  const res = await fetch(process.env.NEXT_PUBLIC_WEBINY_API_URL, {
    method: 'POST',
    headers: {
      'Content-Type': 'application/json',
      'Authorization': `Bearer ${process.env.WEBINY_API_SECRET}`
    },
    body: JSON.stringify({
      query,
      variables,
    }),
  })

  const json = await res.json()
  if (json.errors) {
    console.error(json.errors)
    throw new Error('Failed to fetch API')
  }

  return json.data
}
The POST verb is used to post the query we want our GraphQL API to return. Also please note in the 'Authorization' header, you need to ensure you have Bearer before the API secret. This specifies the method of authentication.
Here’s a basic query you can use to fetch all content for the model posts and return only the slug field:
export async function getAllPostsWithSlug() {
  const data = await fetchAPI(`
    query PostSlugs {
      listPosts {
        data {
          slug
        }
      }
    }
  `)
  return data.listPosts.data
}
There’s more information about using GraphQL here .
Here’s a more detailed query which uses variables and sorting to fetch multiple groups of data:
export async function getPostBySlug(slug) {
  const data = await fetchAPI(

    `
      query PostBySlug( $PostsGetWhereInput: PostsGetWhereInput!) {
        post: getPosts( where: $PostsGetWhereInput ) {
          data {
            id
            title
            slug
            description
            createdOn
            featuredImage
            body
            author {
              name
              slug
              picture
            }
          }
        }
        morePosts: listPosts(limit: 2, sort: createdOn_ASC) {
          data {
            id
            title
            slug
            description
            createdOn
            featuredImage
            author {
              name
              picture

            }
          }
        }
      }
    `,
      {
        variables: {
          PostsGetWhereInput:{
            slug: slug
          }
        }
      },
      preview
  )
  return data
}
Hopefully with this information you will be able to use the data from Webiny to render your pages.
To create static pages, create a file in the /posts/ directory called [slug].js, and add this function at the bottom:
export async function getStaticPaths() {
  const allPosts = await getAllPostsWithSlug()

  return {
    paths: allPosts.map((post) => {
      return {
        params: {
          slug: `/posts/${post.slug}`,
        },
      }
    }),
    fallback: true,
  }
}
This will render all of the posts as static pages.
To get data for each statically generated page add the following to the bottom of the page:
export async function getStaticProps(context) {
  const { params } = context
  const data = await getPostBySlug(params.slug)

  return {
    props: {
      preview,
      post: {
        ...data.post.data,
      },
      morePosts: data?.morePosts
    },
  }
}
Now you will be able to access props.post in the render and build out your UI:
export default function Post({ post, morePosts, preview }) {
  return (
    <h1>{post.title}</h1>
  )
}
Rendering rich text fields
You may have noticed that we chose a rich-text field for the body of the post. To render this in React, you can use our rich text renderer package :
npm install @webiny/react-rich-text-rendererOnce the package is installed, you can use it as you would any other component:
// import the renderer
import { RichTextRenderer }

// in your render function
<RichTextRenderer data={content} />
It’s entirely possible to make your own renderer. If you open that package you’ll see how we have done it, you can copy that code and modify it as you wish.
For more information about the rich text renderer package, see this documentation
Using NextJS preview mode
NextJS provides an API for previewing content that hasn’t been published yet, and is in a “Draft” state. For more information, see the documentation on NextJS website . Here’s how to use Preview mode with Webiny.
Webiny has a separate API for published and draft content. Although we can use the same API token to connect to both APIs, we need to fetch from the correct API endpoint.
Choose API Keys in the sidebar, and ensure that preview is checked in the API key you are using. Then go to API Playground and choose Headless CMS - Preview API on the tabs at the top of the main window.
Copy the URL and save that into your .env.local file (perhaps call it NEXT_PUBLIC_WEBINY_PREVIEW_API_URL).
First, we’re going to extract whether the user has preview mode enabled from the getStaticProps() function:
export async function getStaticProps(context) {
  const { params, preview } = context
  const data = await getPostBySlug(params.slug, preview)

  return {
    props: {
      preview,
      post: {
        ...data.post.data,
      },
      morePosts: data?.morePosts
    },
  }
}
Now we can pass that variable to our fetchAPI() function
export async function getPostBySlug(slug, preview) {
  const data = await fetchAPI(

    `
      query PostBySlug( $PostsGetWhereInput: PostsGetWhereInput!) {
        post: getPosts( where: $PostsGetWhereInput ) {
          data {
            id
            title
            slug
            description
            createdOn
            featuredImage
            body
            author {
              name
              slug
              picture
            }
          }
        }
        morePosts: listPosts(limit: 2, sort: createdOn_ASC) {
          data {
            id
            title
            slug
            description
            createdOn
            featuredImage
            author {
              name
              picture

            }
          }
        }
      }
    `,
      {
        variables: {
          PostsGetWhereInput:{
            slug: slug
          }
        }
      },
      preview
  )
  return data
}
Next modify your fetchAPI function to add the preview parameter:
async function fetchAPI(query, { variables } = {}, preview ) {
 const url = preview ? process.env.NEXT_PUBLIC_WEBINY_PREVIEW_API_URL : process.env.NEXT_PUBLIC_WEBINY_API_URL

  const res = await fetch(url, {
    method: 'POST',
    headers: {
      'Content-Type': 'application/json',
      'Authorization': `Bearer ${process.env.WEBINY_API_SECRET}`
    },
    body: JSON.stringify({
      query,
      variables,
    }),
  })

  const json = await res.json()
  if (json.errors) {
    console.error(json.errors)
    throw new Error('Failed to fetch API')
  }

  return json.data
}
To complete the setup, you can follow the steps from “Securely accessing it from your Headless CMS” on the NextJS documentation site .
Conclusion
Using Webiny for a Headless CMS using NextJS is an easy, cost-effective and scalable solution.
As well as the basics we’ve discussed here, you have virtually no limit on the amount of records you store, or even the amount of images you store inside Webiny. You can also have multiple locales to support multiple languages, and other apps are included such as the page builder . Also, we have pricing plans that scale if you’re a small business owner or enterprise customer.
We hope you enjoy using Webiny to create your next website!